


Traefik as a Dynamically-Configured Proxy and Load-Balancer
Traefik as a Dynamically-Configured Proxy and Load-Balancer

This post has also been published on Rancher.com on 12-07-2017
When deploying applications in the container world, one of the less obvious points is how to make the application available to the external world, outside of the container cluster. One option is to use the host port, which basically maps one port of the host to the container port where the application is exposed. While this option is fine for local development, it is not viable in a real cluster with many applications deployed. One solution is to use an HTTP proxy/load balancer. This container will be exposed using standard HTTP/HTTPS ports on the host, and will route traffic to the application running as a container.
In this post, we will setup Traefik as an HTTP proxy / load balancer for web services running in a Rancher Cattle setup. Traefik will dynamically update its configuration using the Rancher API. An SSL wildcard cert will be used. The (nice) Let’s Encrypt ACME feature Traefik is offering will not be used here. We will make use of Rancher secret feature. If you plan to use Traefik with Let’s Encrypt SSL certs, I encourage you to use the Traefik stack available in Rancher Community Catalog.
Context
In this demo, we already have a running Rancher environment, using the Cattle orchestrator with three nodes and one web application to be published so that it can be accessed outside of the Cattle cluster. Our application will be the simple “whoamI” application, basically showing the IP address of the node it is running on.
We will use a wildcard SSL domain, as the Rancher install is not available from outside the LAN (on-premises platform). We will also leverage Rancher’s experimental secrets to store the SSL certs, as well as the Rancher API key and secret.
Rancher Setup
We have three nodes running on our Cattle cluster:

Notice the traefik.lb=true label on some hosts. We will use them later.
Deploy Web Application
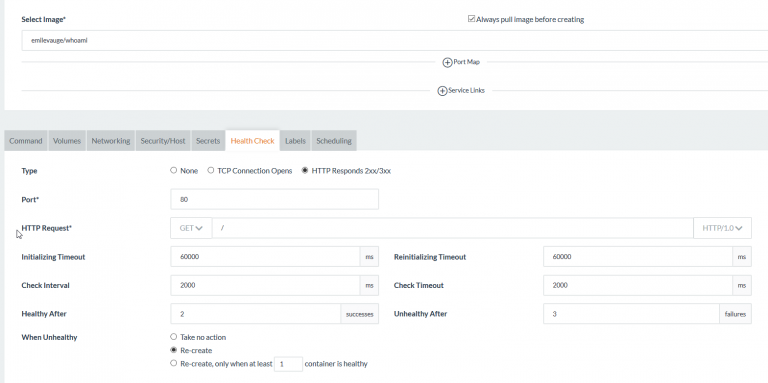
We will create a new stack for our test app. Create a blank stack, we will call it iamfoo. Then add a service using the emilevauge/whoami image. Add an HTTP health check as follows:
Prepare API Key
Let’s create a Rancher API key: in the UI, go to API\key, click on “Advanced” and create a new key by hitting the “Add environment API key” button:

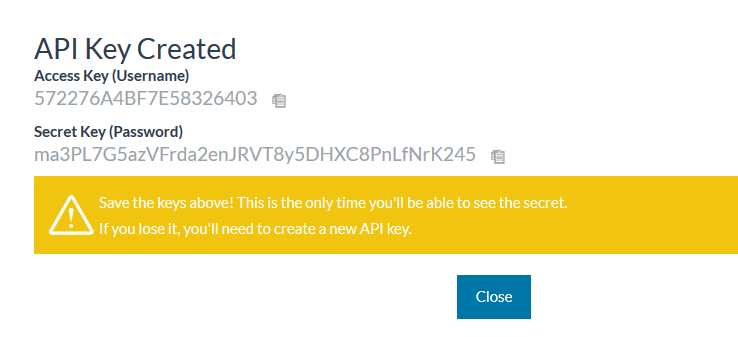
*Note: As warned by the UI, write down the secret key as you won’t be able to see it again
Repeat same operation for the API password, SSL cert and SSL key.
Deploying Traefik
We will use the mch1307/rancher-traefik:1.3.1.2 image. It is an alpine based image, inspired from rawmind0.
The image will read the SSL certs and Rancher API key/secret from Rancher secret through environment variables that we will define when creating the service.Create new stack, we will call it prx.
Then add a service to it.
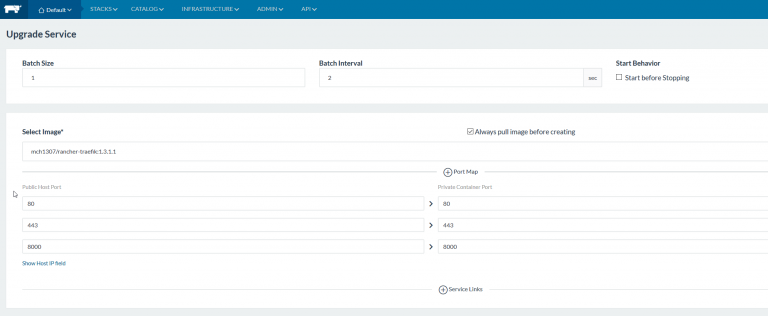
following ports:
- 80 -> http
- 443 -> https
- 8000 -> Traefik UI
Those ports will be exposed on the host(s) that will run the Traefik container(s). Make sure they are not yet in use, or choose other ones.
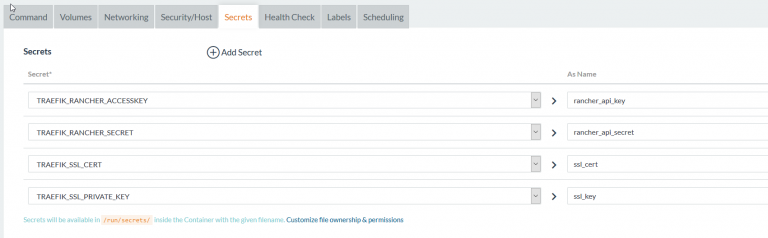
Secrets
In the Secrets tab, set up your secrets:
Container environment variables
To add secrets as environment variables, go to the “Command” tab and define environment variable as follows. The name of the env vars should be:
- TRAEFIK_RANCHER_ACCESSKEY = Rancher API key
- TRAEFIK_RANCHER_SECRET = Rancher API secret
- TRAEFIK_SSL_CERT= Wildcard SSL cert (bundle ii with intermediate CA if applicable)
- TRAEFIK_SSL_PRIVATE_KEY = SSL private key (without password protection)
- TRAEFIK_RANCHER_ENDPOINT = URL to Rancher API
- TRAEFIK_RANCHER_DOMAIN = domain to be used in Traefik
The secrets are available at /run/secrets/alias. Alias is defined in the secrets in the previous step.
Hint: Copy the table above and paste it to the first environment variable. Rancher UI will create all the variables so that you only need to put appropriate value in the right column.
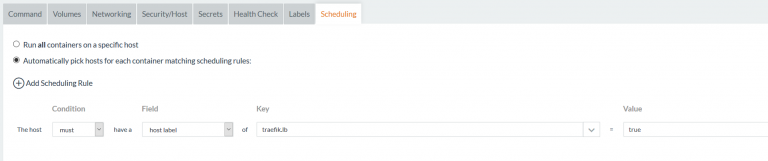
Scheduling
Go to the “scheduling” tab and create a new scheduling rule. We will create a rule based on host label. It means we will ask Rancher to run the container on host having a given label. Remember the labels we saw in the Rancher infrastructure (traefik_lb=true), this is where they will enter into action:
Once done, click on “Create” to trigger container deployment. Rancher will download the image from Docker Hub and them schedule the container. You should have a running Traefik stack within a few minutes.

Setup the Web Application
Traefik needs a few labels at the web app level in order to automatically create the config for the service. These are the different labels we will use: * traefik.enable = true * traefik.port = 80 * traefik.frontend.rule = Host:whoami.domain.com
Go to the whoami stack, choose upgrade and add the labels.
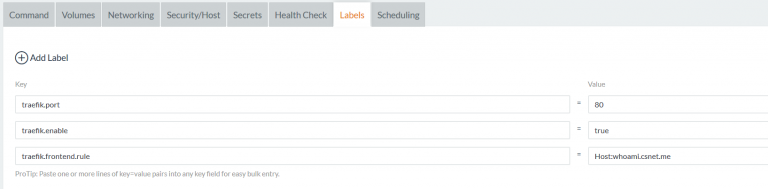
Hint: Copy the table above and paste it to the first label. Rancher UI will create all the labels and values. Then adapt the values to suit your setup. Additional ones can be used, refer to the Traefik documentation
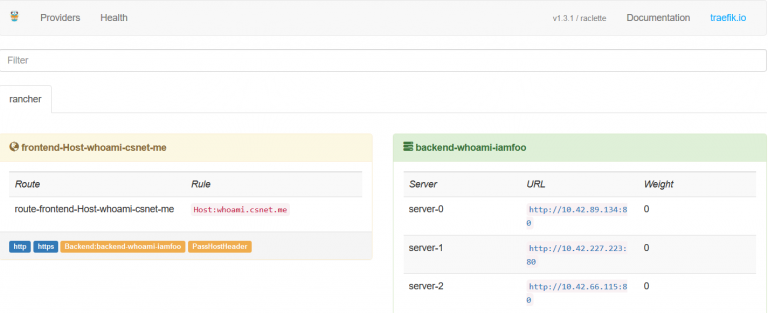
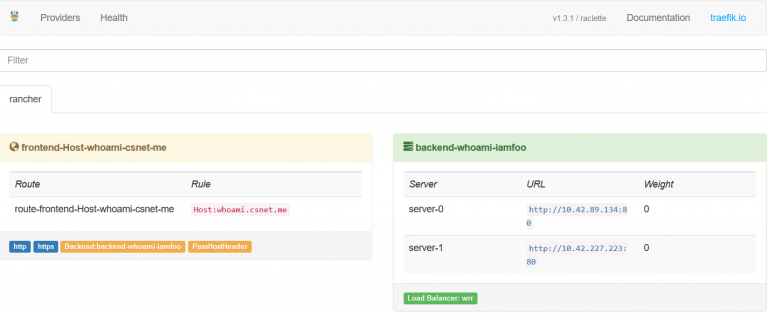
Once the whoami stack is upgraded, you should be able to access the traefik UI on port 8000:
Testing Traefik
You should now define a DNS alias for the whoami that points to the rancher host(s) that runs the traefik container. Once done open your favorite web browser and go to the whoami URL.
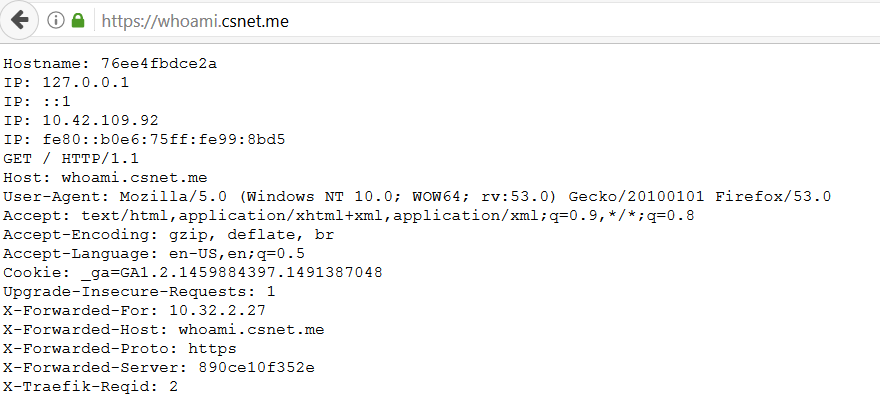
Traefik will redirect the HTTP traffic to HTTPS using the wildcard cert we configured earlier. Hit F5 several times, you will see different IPs which shows the load balancing feature of Traefik. You can run further test by scaling up or down the number of whoami containers. Check the traefik UI to see the number of whoami backends is updated.
Conclusion
We have seen how traefik can be deployed as proxy / load balancer in a rancher cattle cluster, using basic setup. Traefik offers many other options, consult the documentation for further information


Share this post
Twitter
Facebook
Reddit
LinkedIn
Email