
Overview
In the previous post, I was introducing my personal project “gomotics”, a domotics API for Niko Home Control, written in Go. In this post I will detail how I setup the “build – test – release” pipeline for this project.
Objectives
The objectives for this “pipeline” are:
- build the code for different platforms
- run the unit tests (sometimes they are more integration tests)
- measure the coverage
- in case of release tag, release the built binaries
- build a docker image and release it on Docker Hub
To achieve those objectives we will use GitHub for sources, Travis-CI for building, Coveralls for coverage, goreleaser to automate the releases to GitHub pages and Docker Hub for our container image release.
Build
The first step is to be able to build the code. Doing this with Travis-CI is pretty straight forward.
If you don’t have an account on Travis, simply signup using your GitHub account and accept the GitHub access permissions. Wait for your account to be synchronized with GitHub and then enable the repository you want to build. Next, create a repo token on GitHub save it and set it up in your Travis-CI environment variables.
Add a “.travis.yml” file to the root of your project as follows
# .travis.yml
language: go
go:
  - 1.8.3
Coverage
We will use Coveralls and the go plugin goveralls for the code coverage. Coveralls will allow you to compute coverage and followup on their web interface:
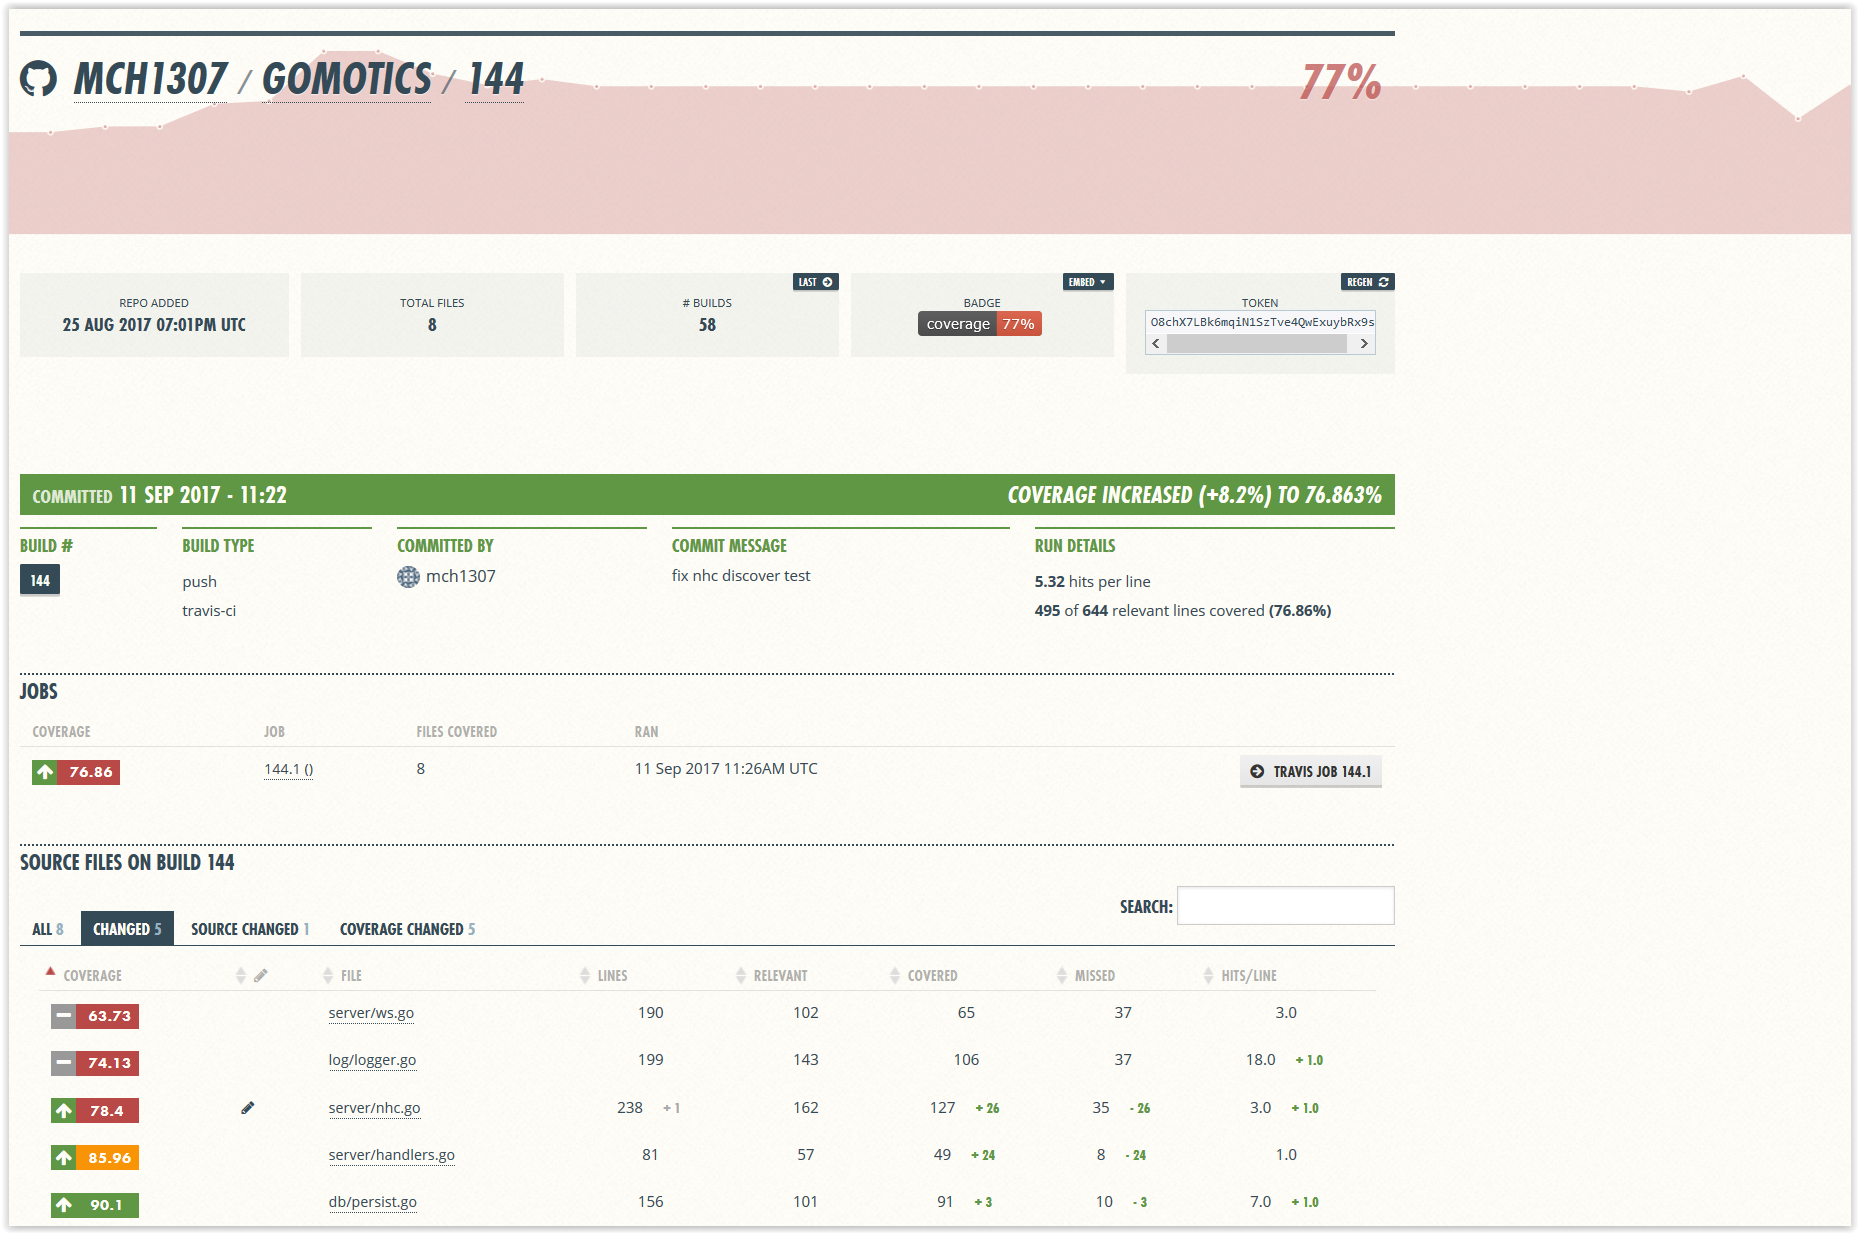
Signup to Coveralls.io using your GitHub account and add your project’s GitHub repo.
Then add the following lines to your .travis.yml file:
before_install:
  - go get github.com/mattn/goveralls
script:
  - $HOME/gopath/bin/goveralls -v -service=travis-ci
Release
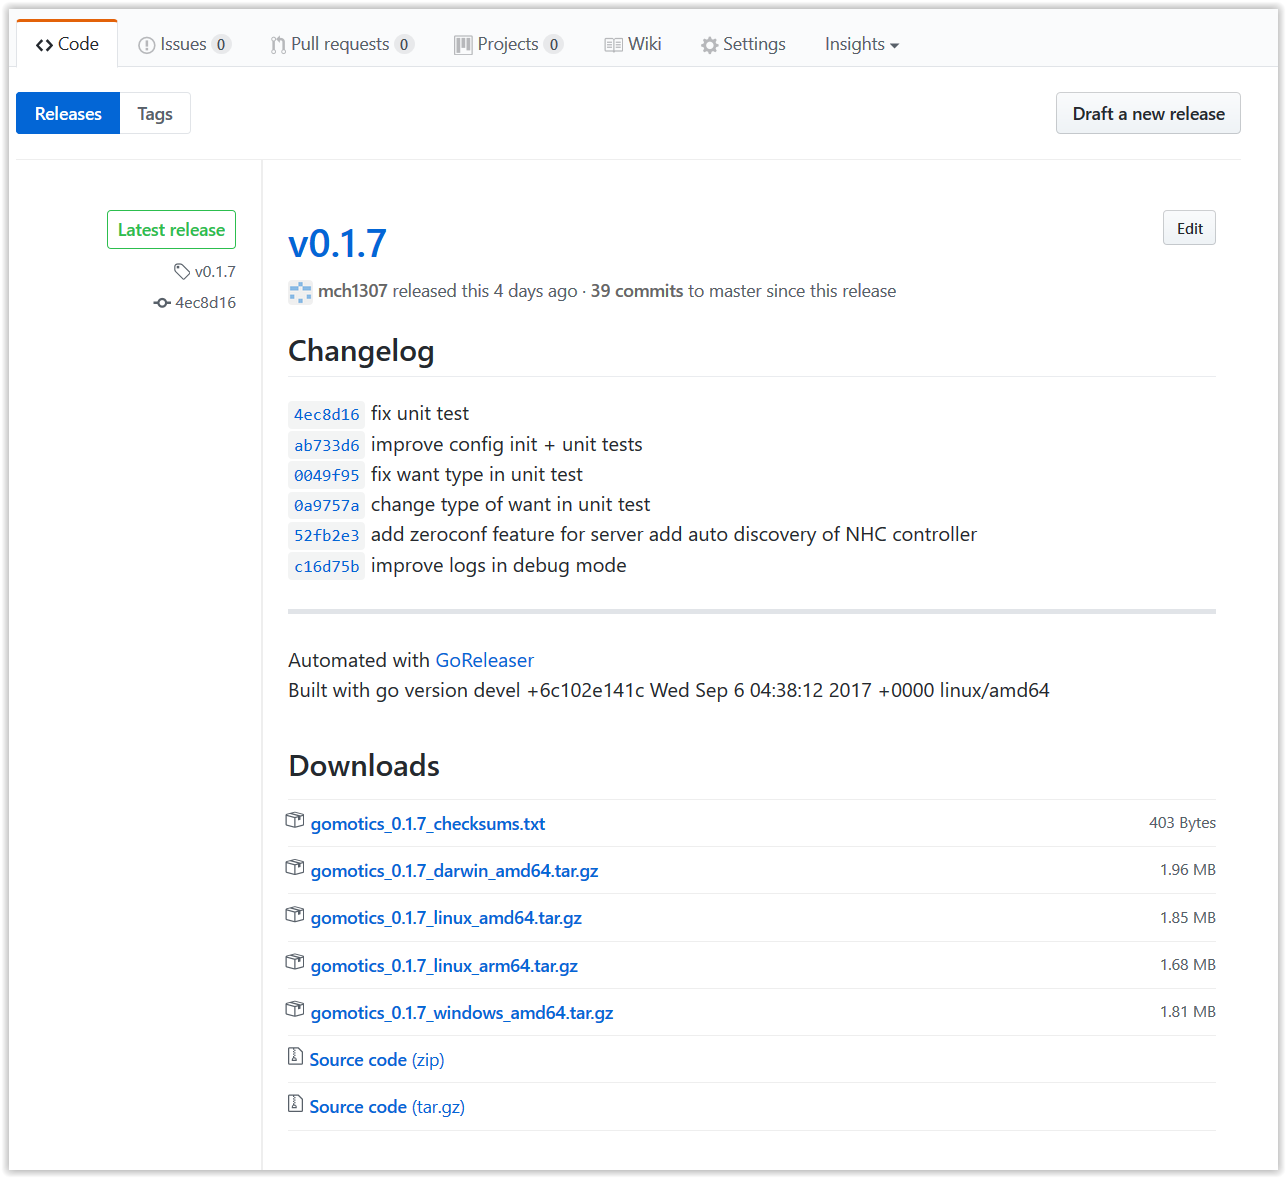
Once the binaries are built, we need to release them. We will publish those to GitHub release page using goreleaser. This tool will publish our binaries to GitHub Release Page and create a nice looking changelog with the commit comments:
To implement goreleaser, add a .goreleaser.yml file to the root of your project:
# .goreleaser.yml
# Build customization
builds:
  - main: app.go
binary: gomotics
goos:
  - windows
  - darwin
  - linux
goarch:
  - amd64
  - arm64
# Archive customization
archive:
  format: tar.gz
after_success:
- test -n "$TRAVIS_TAG" && curl -sL https://git.io/goreleaser | bash
Docker
We also want to deploy the application as a Docker image. Let’s use Travis to build our image and then push it to Docker Hub.
Setup the docker hub credentials on Travis-CI web interface. Password should be secured:

Then add the following lines to the travis file in your project:
services:
  - docker
after_success: - mkdir -p dist - CGO_ENABLED="0" GOARCH="amd64" GOOS="linux" go build -a -installsuffix cgo -o ./dist/gomotics - docker login -u $DOCKER_USER -p $DOCKER_PASSWORD - export REPO=$DOCKER_USER/gomotics - export TAG=`if [ "$TRAVIS_BRANCH" == "master" ]; then echo "latest"; else echo $TRAVIS_TAG ; fi` - echo $REPO:$TAG - docker build -f Dockerfile -t $REPO:$TAG . - docker push $REPO
Those lines instruct the following actions:
- get docker available in Travis environment
- create a dist directory
- build the project for the specified target (linux amd64) to the dist folder
- compile the release version for Docker Hub image
- build and push the image to Docker Hub
Improve your project “look”
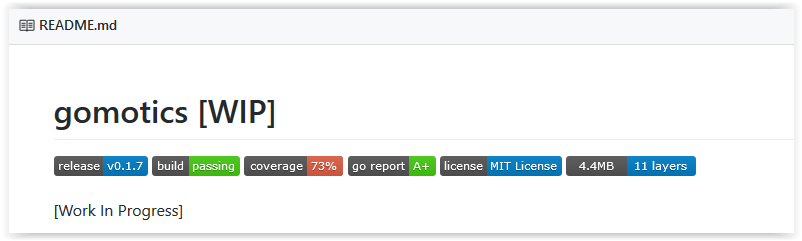
Once you have everything in place, you can improve you project “look” by using badges. Those allow any visitor to have a quick overview on how the project is being developed/maintained.
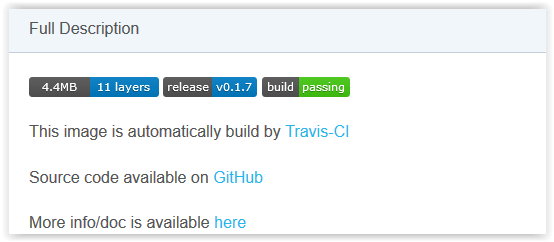
And then the same for Docker Hub 😉
Conclusion
We have seen that setting up an automated CI/CD pipeline is not very complex and that using open source and/or free tools can definitely ease your life and improve you development project life cycle.


Share this post
Twitter
Facebook
Reddit
LinkedIn
Email